Whitelist Incoming Email by IP
In some limited cases, a legitimate sender has been compromised and all of his incoming emails are marked as Spam. Until the legitimate sender will fix their reputation, you can whitelist their incoming emails. This is a type of whitelist based on IPs. If you specify an IP or IP range as whitelist, e-mails sent from such locations will never be marked as spam, for all your domain's e-mail accounts.
To whitelist a sender's incoming email by IP:
- Log in to the Admin Panel
- From the menu, go to Filtering → IP Access List
- Select the IP Type from the dropdown: whitelist.
- A list of existing IPs that were marked as trusted will appear
- You can edit each entry or delete it.
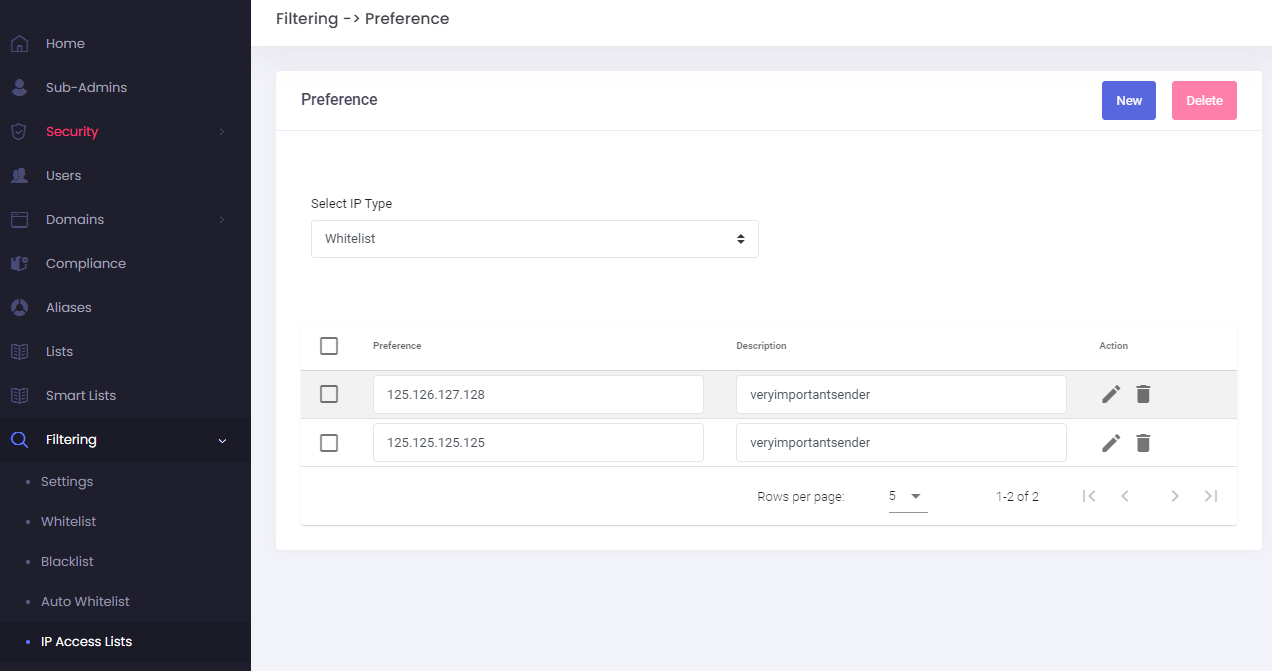
- To add a new entry, click on the New button.
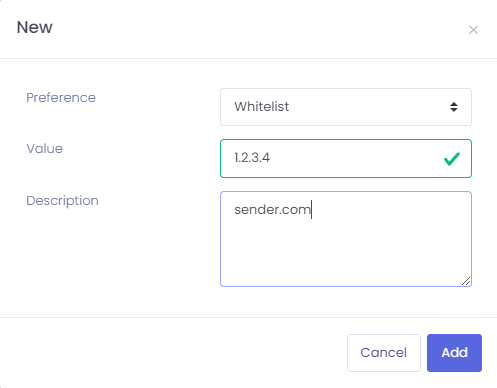
- In the new pop-up:
- Preference: choose Whitelist
- Value: the IP of the sender - get their IP from the Incoming Logs. You may
Set trusted/denied IPs for SMTP (IP Access list)
It's very simple to add trusted IPs for your entire domain, after having logged to https://cp.emailarray.com/admin.
Right after logging in, hover your mouse on top of Filtering and choose IP Access Lists.
...
...
- Description: such as sender's domain or company name - so you can easily remember it later
- Click on the Add button to whitelist the incoming email from this IP.
Blacklist Incoming Email by IP
Some spammers will change the email address or domain regularly which makes it harder to blacklist by e-mail / domain only. For this cases, you can blacklist a sender by IP. If you specify an IP or IP range as
...
...
...
blacklisted and deleted by default, for all your domain's e-mail accounts (this rule can be changed on User level, from the User Panel → Delivery Rules → BlacklistDelete or from the User Panel → Filtering → Blacklisted messages option).
To blacklist a sender's incoming email by IP:
- Log in to the Admin Panel
- From the menu, go to Filtering → IP Access List
- Select the IP Type from the dropdown: blacklist.
- A list of existing IPs that were marked as untrusted will appear
- You can edit each entry or delete it.
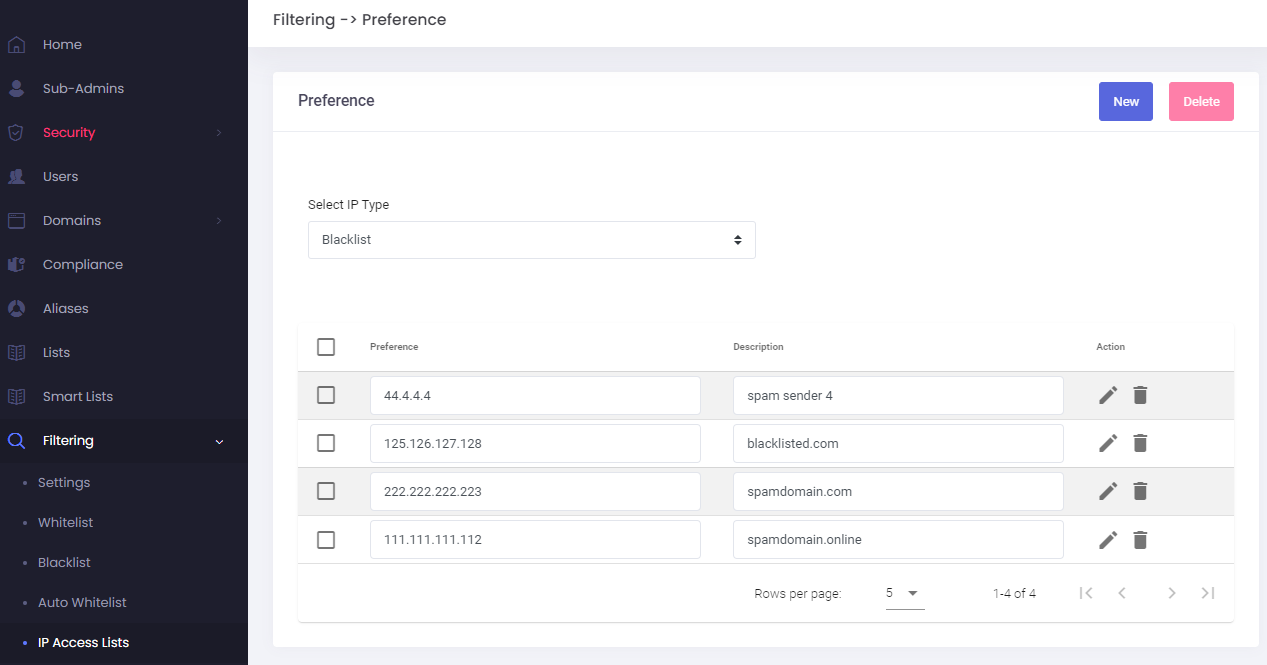
- To add a new entry, click on the New button.
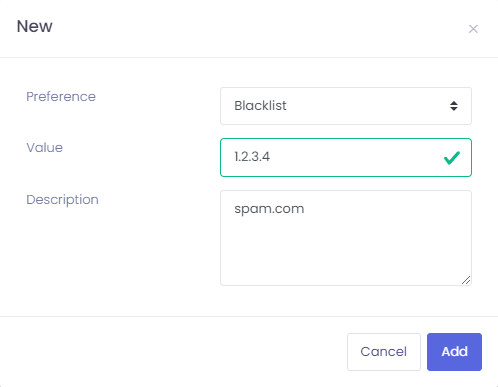
- In the new pop-up:
- Preference: choose Blacklist
- Value: the IP of the sender - get their IP from the Incoming Logs. You may specify a single IP or an IP range using CIDR notation, for example: 192.168.0.0/24. Warning: blacklisting an IP range may cause legitimate emails to not be delivered.
- Description: such as sender's domain - so you can easily remember it later
- Click on the Add button to blacklist the incoming email from this IP. All incoming email from this IP will be marked as blacklisted and deleted by default.
| Panel | ||||||||||||||
|---|---|---|---|---|---|---|---|---|---|---|---|---|---|---|
| ||||||||||||||
|